DNS settings for your Ghost publication
A tutorial on how to setup and configure Domain Name Server (DNS) setting for your self-hosted Ghost publication


What is DNS and why does it matter?
A DNS, simply put, is a service on the internet that allows your website or publication to be accessible on the internet through a domain name. It translates human-readable domain names (like nexusrl.com) to the real IP address of the server that is hosting your website. Without DNS, users would have to memorize numerical IP addresses for every website they intend to visit on the internet.
DNS Records
The DNS records for your website will be configured through the creation and editing of DNS records on your provider's domain name provider. DNS records are text instructions given to a DSN server on how to handle and route requests it receives to your domain name.
There are numerous types of DNS records; below are some of the popular ones.
- A Record - An A record is the most fundamental type of DNS record. It maps a domain name to an IPv4 address.
- AAAA Record - AAAA records also map a domain name to a server IP address, but for IPv6 addresses. IPv6 addresses are starting to become more common as the internet continues to run out of IPv4 addresses.
- CNAME Record - You can use a CNAME record to redirect traffic from one domain name (alias) to another (the canonical name). These never point directly to an IP address.
- MX Record - An MX record is used to direct emails to a mail server
Cloudflare DNS settings
We use Cloudflare services at Nexus (and I would recommend trying them out), and so the rest of the tutorial is going to
Step 1: Access your Cloudflare account
Navigate to your Cloudflare dashboard at https://dash.cloudflare.com/ and click on the domains section. Select the domain your Ghost publication will be accessible from. Click the DNS Records button on the top right.

Step 2: Add DNS records
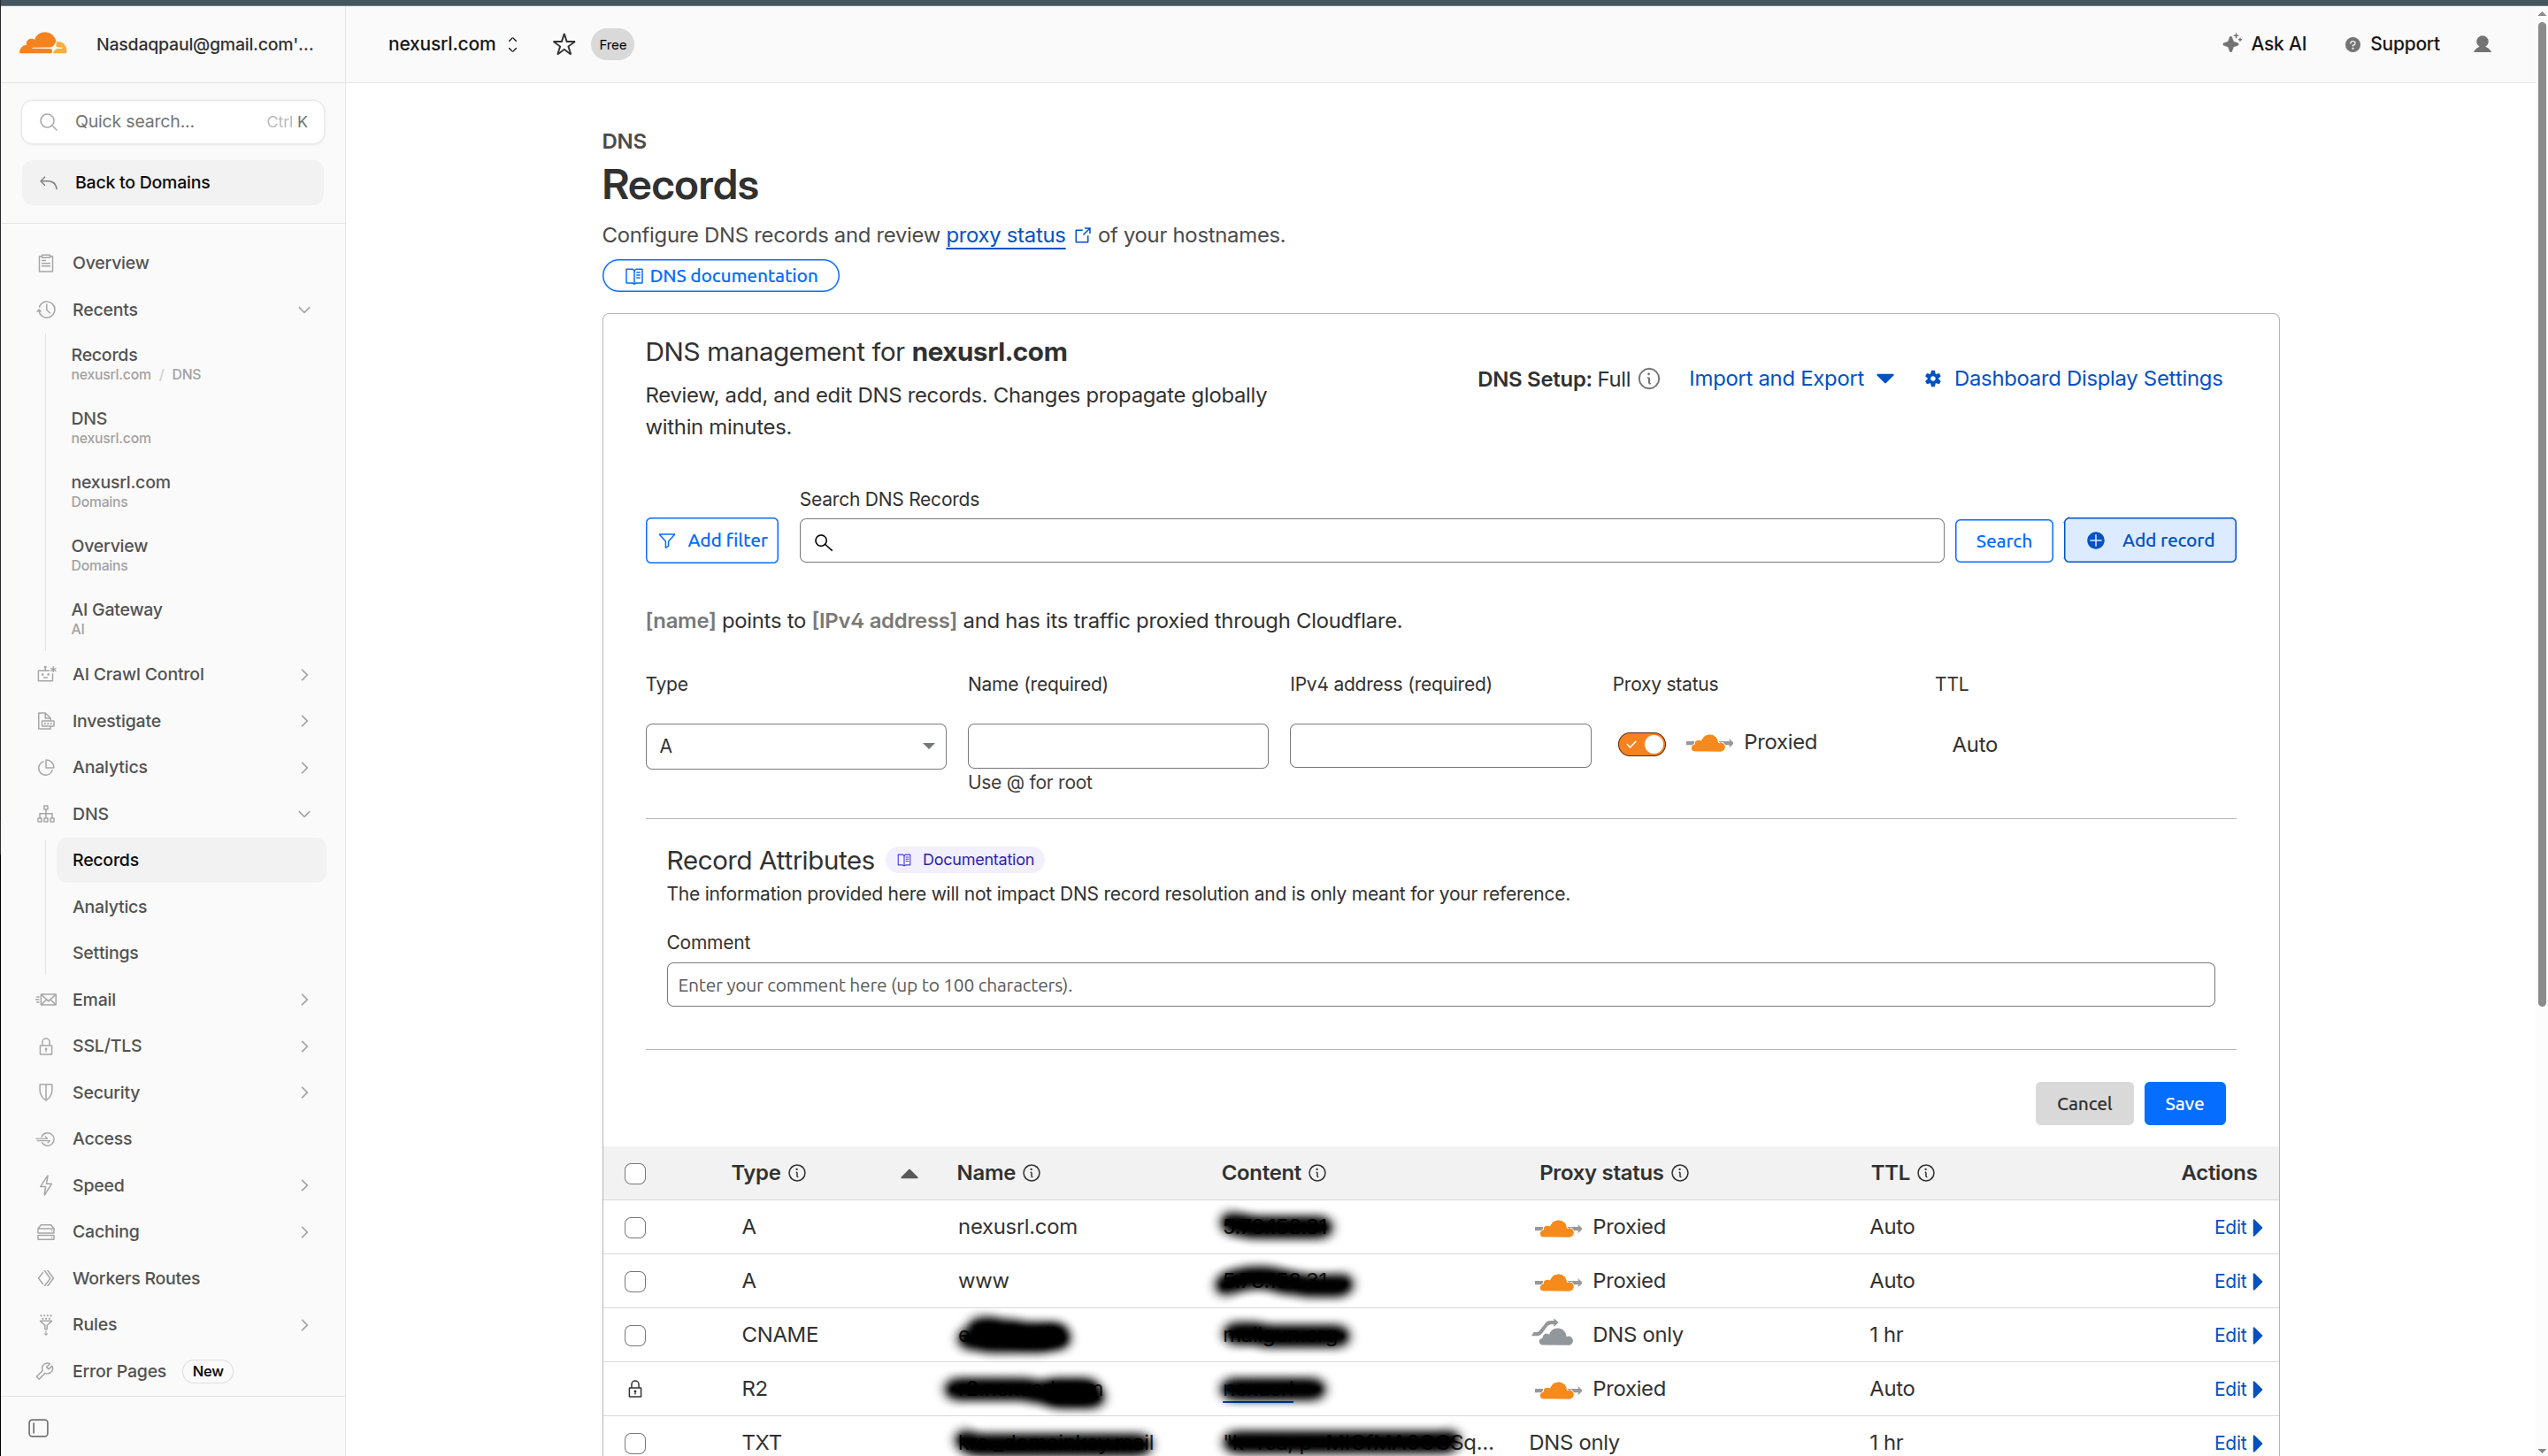
You should be shown the list of DNS records on your domain if it has any. Click on the Add Record button to bring up the 'add record' form.
- In the type field, select A as the type of your DNS records.
- If your publication will be accessible from a subdomain, such as blog.your-domain-name.com, add the name of the subdomain (e.g., blog) in the name field. Otherwise, place the @ symbol in the name field.
- Place the IP address of your server in the IPv4 address field.
Wait a few minutes, and your publication should be accessible from your domain name.

